Im creating this thread for future shooting sport enthusiasts to utilize if so desired. Use these techniques and procedures at your own risk! I will not be held accountable and herby release all liability if you screw up your work.
A little background...
I special ordered a JM Pro after watching a youtube video of Jerry Miculek reviewing(promoting) the gun. I immediately knew that it was the auto-loader I wanted! I special ordered one from my LGS. Awaiting the arrival of the gun, I must have read every internet post and saw every video of the JM Pro(and other 930's). I read alot of negative reviews and heard of issues with the model, with FTF/FTE being most prominent. Not wanting to have these issues with my new gun, I proceeded as follows:
Mossberg 930 Signature series " Reliability Tuning"
(may apply to other 930 models)
BEFORE YOU BEGIN...
Always make certain, by visually inspecting your firearm and cycling the action, that the firearm is unloaded and safe to handle.
Mossberg ships NEW and SERVICED firearms with a protective grease which needs to be removed first and foremost. Failure to do so WILL present FTF/FTE issues right away. This grease is nasty, filthy stuff and has trapped debris throughout.
Instructions for dissasembly can be found in your new owners paperwork or online here http://www.mossberg.com/manuals/930%20935%20Rev%20D.pdf
With your new gun disassembled, you should be left with stock/receiver/magazine tube combo,trigger group, bolt and carrier, forearm retainer, return spring, pusher assembly, spacer tube, gas piston, barrel, forearm, magazine extension and nut, and mag spring and follower.
The focus it to preemptively recreate the wear you'll get after "break-in", without shooting hundreds of rounds and the headache of the FTF/FTE during the break-in period.
Pick a component and clean it thoroughly using cotton patches(old shirt cut up) and brake cleaner(cuts grease). Be cautious about spraying any parts, especially plastic parts, with the brake cleaner as it will discolor and stain the plastics. The idea is to spray the patch with a small amount of cleaner then wipe away the grease. Set cleaned parts aside and continue until you've cleaned and closely examined all the parts of the gun, looking for any hidden/remaining grease. Remember to clean the inside and outside of each piece. Using q-tips helps get those cracks and crevices. The more detailed you clean it the first time will aid in reliability.
With all the parts cleaned and de-greased, pick a cleaned part and ask yourself "does this part move mechanically", and "does this part have a mate". These are two most important aspects of this procedure. All moving/mating parts need to be surfaced, smoothed, deburred and have the edges broken using a fine sand paper(I use 600 grit commonly). DO NOT SAND, FILE, or BREAK EDGES ON THE HAMMER /SEAR. Remove as little bluing as possible! Look for high spots in stamped parts, visually apparent after light sanding. The idea it to break edges, and smooth mating surfaces reducing friction, not removing alot of metal. Being heavy handed wont benefit you here. This gun ships with a matte phosphate coating and some of the blued parts were blued before being deburred.
Parts to focus on are the bolt and carrier, the groves in the receiver that guide the bolt carrier, the leading and trailing outside edge of the follower, the edges(inside diameter/OD optional) of the spacer tube, the lifter edges and mating surfaces where it attaches to the trigger group, the trigger group faces where the lifter rides, the pusher assembly edges, and any other burred edges you can find during your thorough inspection and deburring.
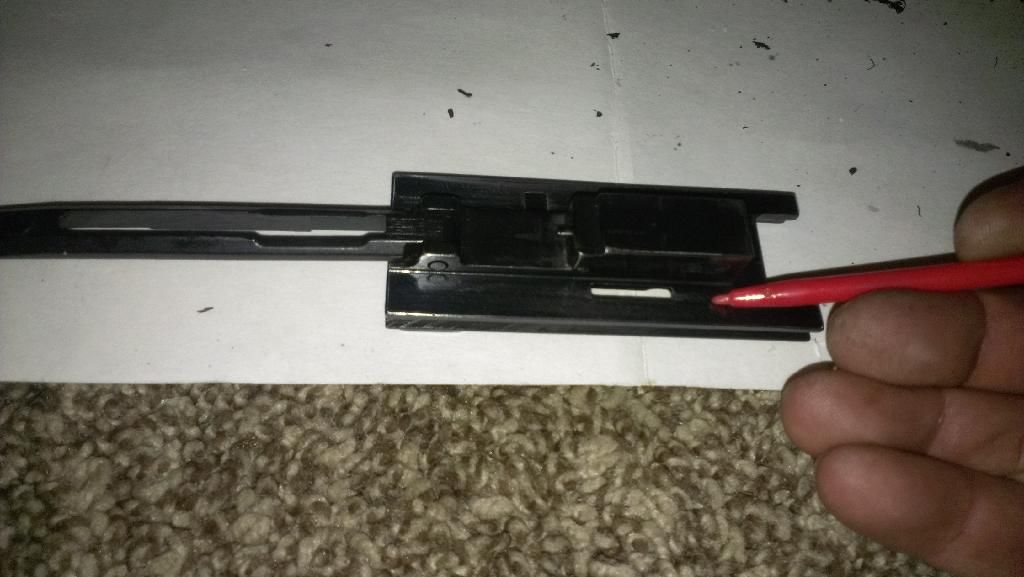
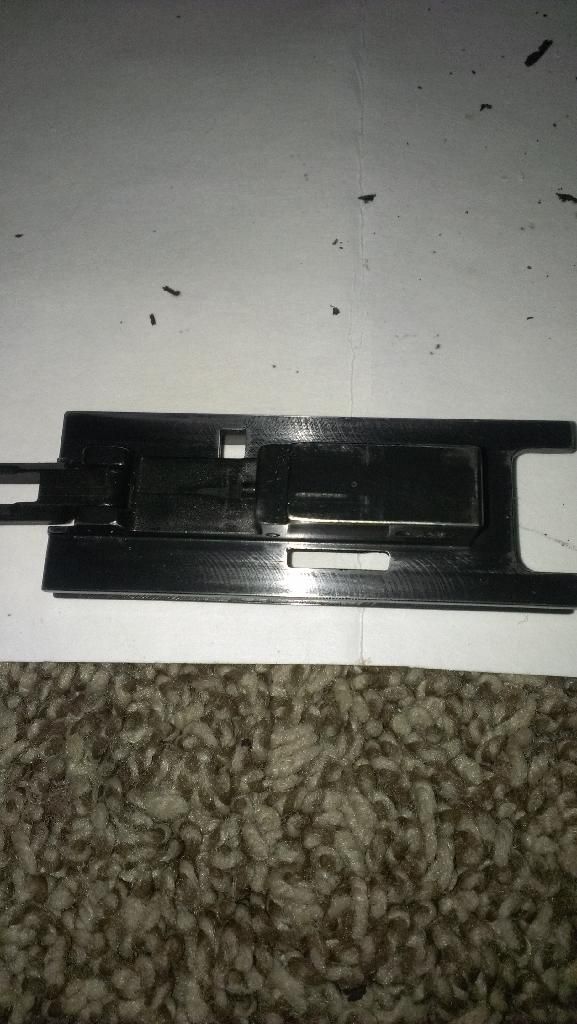
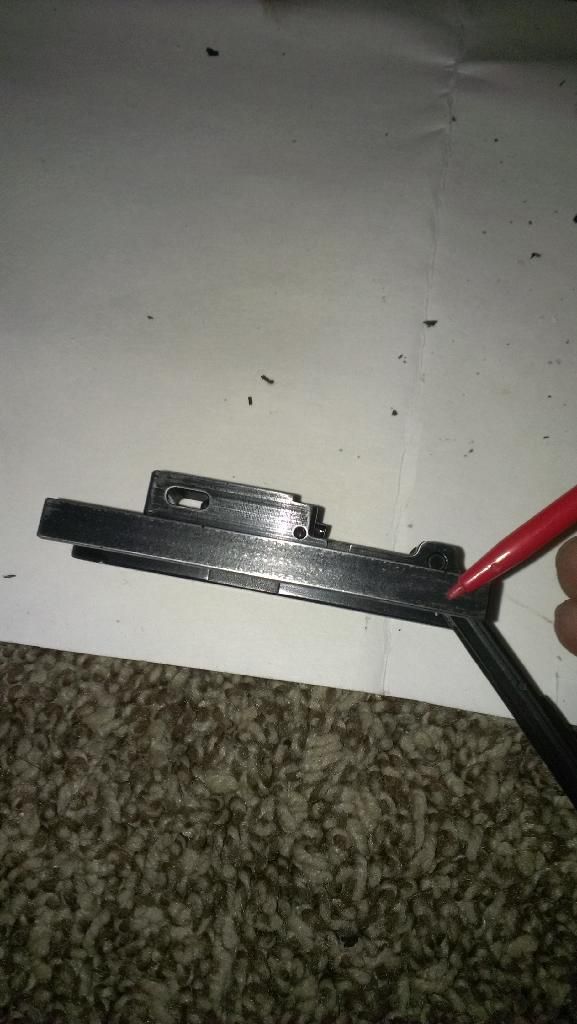
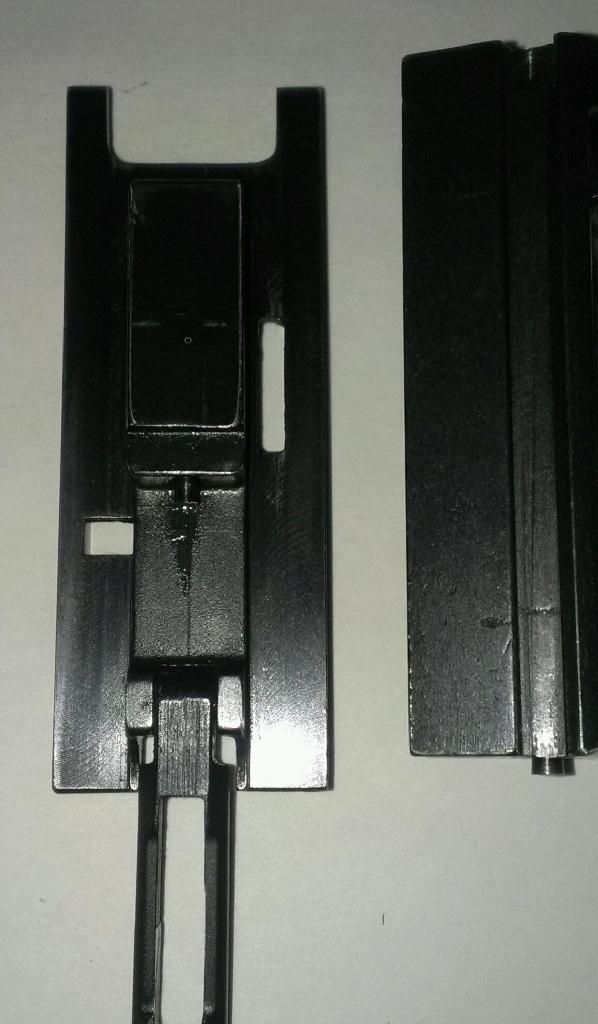
Look Closely at the following pictures. Youll notice that all the edges on the carrier are "broken". There are no sharp edges on the bolt or carrier, anywhere.
Notice in the following pictures, the edges around the holes are shiny. Thats because they were high spots from stamping the parts leaving high ridges, which is another aspect to rectify.
Special attention should be paid to the mating surfaces of the bolt and carrier. I like to judge the smoothness by inverting the bolt and carrier, so the carrier bottom is up, grasping the bolt between my fingers and letting the carrier slide back and forth, sanding and testing until I cant feel any hangups or roughness during the sliding. Mine slides like glass now, with minimal resistance and friction. When I started it barely moved on its own without grinding against itself. Persistence and patience will pay off BIG TIME!
After each part is deburred and cha****ed where necessary, wipe them with a lightly oiled patch, and set aside until all parts have been serviced.
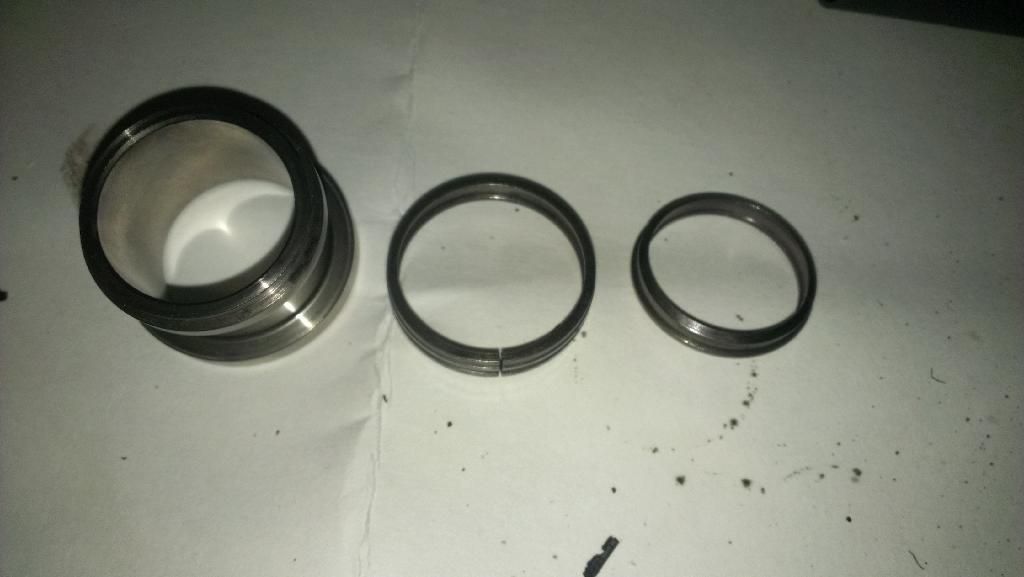
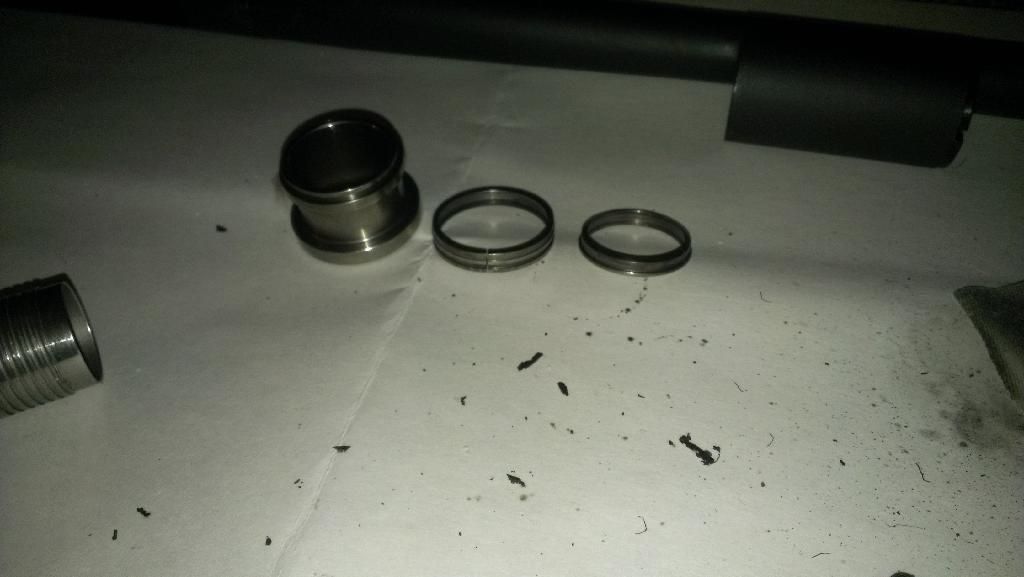
The piston should not be sanded, and should be disassembled to clean under the rings. A great video of how to remove these rings can be found here -> https://www.youtube.com/watch?v=6oW1wJis9LY
The first time I cleaned under these rings, there was buildup falling out all over the place. They were absolutely filthy after shooting a few hundred rounds.
Oil is not required on chromed pistons and rings. Oil on the piston should be very light surface oil(without gloss or shimmer) and in my opinion should be avoided because the hot gases will burn and emulsify the oil, creating a gummy buildup that will cause the piston ring to expand and cause drag in the piston housing.
Notice the debris on the white paper... That is ALL from the rings.
The piston should be able to be actuated easily without resistance(very minimal if any).
Now that you have all of your mechanical parts cleaned, deburred and oiled, you can reassemble the gun in reverse order. If you need reference, refer to the link for the manual for further assistance. You will need to function check the firearm, after reassembly, for proper function.
MAKE SURE YOUR CHOKE TUBES ARE TIGHT AND CHECK FREQUENTLY DURING FIRING SESSIONS, WITH THE GUN UNLOADED! I cleaned all three of the factory tubes and greased the threads with white lithium grease spray. My first time out the tube unscrewed about 1/6th turn after only 50 rounds!
I have not experienced a single issue, described online, during the operation of my new gun. I have fired tall brass heavy loads, low brass target bulk ammo, and custom reload low recoil light loads without incident.
With some patience and care, this gun is absolutely amazing.
Does it require extra effort on your part? Yes, but at the current price point, this should be expected with any budget firearm. Quality control is hit or miss and personal care from the factory will not be present in newly shipped budget firearms.
This gun is a great firearm and enjoying it the first time out will leave you with a pleasurable experience... THE FIRST TIME AROUND!
Good Luck, and be safe!
-t79d
Results 1 to 6 of 6
-
03-04-2014, 10:40 AM #1I am a Forum User


- Join Date
- Sep 2012
- Location
- Plainwell
- Posts
- 536
 [PICS] Mossberg 930 JM Pro reliability services (New- Out Of Box)
Last edited by tyler79durdan; 03-06-2014 at 08:14 AM.
-
03-04-2014, 06:43 PM #2I am a Forum User


- Join Date
- Sep 2012
- Location
- Plainwell
- Posts
- 536
One of the few drawbacks...
Corrected!
Lifter/cartridge carrier sent to C-Rums, as of today, for welding/extension services!
Consider the service if you've experienced the "bite" a lifter can have on your thumb...
-
03-06-2014, 11:37 PM #3I am a Forum User


- Join Date
- Sep 2012
- Location
- Plainwell
- Posts
- 536
Reliability Upgrade
Came across a lost tip from Jerry Miculek about the 930 in general.
Polish the tip of the cartridge stop with 600 grit sand paper for friction relief on the cartridge releasing action.
I can confirm that it does seem to allow the cartridge to release into the loading port slightly easier. I would recommend adding it to the list of areas to polish, based on Jerry's tip.
It took about 20 mins.
OP can be found here
http://www.brownells.com/.aspx/lid=1...e-Tube-Problem
-
03-15-2014, 02:26 AM #4I am a Forum User


- Join Date
- Sep 2012
- Location
- Plainwell
- Posts
- 536
While we were down for the big forum changeover, my lifter came back from C-Rums. It looks great and appears to be factory at first glance. They did a great job extending the gate and filling the forks. It really does keep your thumb much safer. Now im just waiting on my replacement barrel and backup lifter, before I go test out the welded lifter / carrier...
-
03-17-2014, 02:51 PM #5I am a Forum User


- Join Date
- Sep 2012
- Location
- Plainwell
- Posts
- 536
Ok, I have great news... The gun is performing like a dream. No FTF/FTE at all since the initial work. I have had it out 5 times and its seen about 400 rounds of mostly Federal Wally bulk 3-3 1/8 dram eq., and a few(unwillingly) Winchester wally bulk garbage. I will say that I had an FTF/FTE because a win hull separated from the base and left its hull behind during extraction... I am glad that the next round didn't have enough momentum to force the hull past the forcing cone(if thats even possible). Nothing that a cleaning rod on-site didn't fix though. Still having a hard time finding extended chokes locally and will most likely go Briley.
-
03-20-2014, 04:27 PM #6I am a Forum User


- Join Date
- Apr 2012
- Location
- Metro Detroit
- Posts
- 1,187
Delete this post please
Last edited by Deadmeat3344; 03-20-2014 at 05:04 PM. Reason: stupid comment
|
|



 Reply With Quote

