

So I bought a 1917 Enfield out of one of the Facebook Gun groups. A 1918 Remington. The price was right, I only have a few hundred into the gun and it was complete, non-sporterized and in fairly good condition other than the bore. The bore was wasted, literally a sewer pipe. Too bad since it was original. The gun is a mixmaster with both Eddystone and Remington parts. I knew going in I would need to re-barrel it with a new tube for use in vintage military class competition. Re-barreling these can be a bit of a PITA.
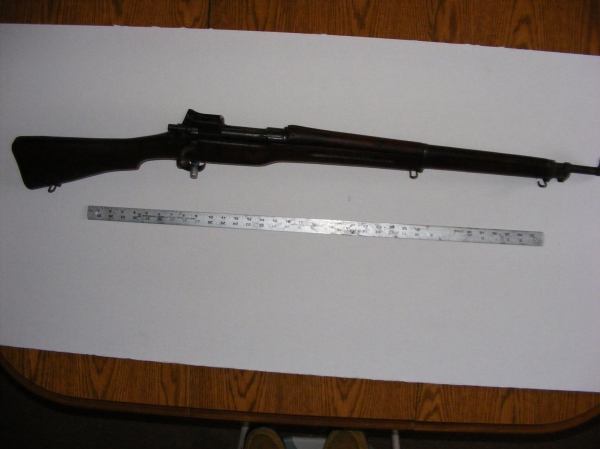
Excuse the poor photo of the complete gun. I did not take any before I stripped it down.
So Saturday I headed to the CMP North Store @ Camp Perry, just East of Port Clinton, Ohio. They had everything I needed in stock. So I left with a new Criterion barrel for a 1917, a 3 way action wrench (M1, M1 Carbine & 1903 / 1903A3) and a pair of barrel vises - 1903 & M1. I have a few action wrenches and barrel vises I have made for 700 Remingtons and a few bushings I have made that really don't work as well as I like so for the price, dedicated items were good investments as I plan to do many more of these in the coming years.
Now the 1917 will not fit the action wrench as it comes. It has the same profile as a 1903 action but is overall larger. A dremel with a sanding drum, some time and patience fixes that. Still usable with a 1903 if you shape shim stock. The difference in profile is about 1/16 inch.
The 1903 barrel vise will work with the 1917 barrel as is. The vise has a tapered hole that matches the taper of the 1917 barrel as well as the 1903 and A3 barrels. The clamp screws are 5/8 - 11 cap screws and most people will not have the appropriate allen socket to fit (1/2) and finding one at your local hardware will be a futile attempt, try Harbor Freight instead. I replaced them with 2 1/2" grade 8 cap screws. Problem solved. Clamping the barrel in the vise is easy. Getting it not to slip is not. You need something between barrel and vise to prohibit slip. Lead, copper, a lot of things work. I prefer grabbing a rosin bag for bowling or baseball bats. Dust the gripping surface. Insert barrel & receiver and clamp it down. Position isn't important as long as you can get good leverage on the wrench. A sturdy bench is very important.
Eddystone Enfields are notorious for not breaking loose. The barrels were machine installed. Remingtons and Winchesters are rumored to be less difficult. This Remington was not the case. When barrels are installed the threads being timed, the shoulder is crushed to press fit. If you cannot break it loose, and it will take some force, you have to relieve the barrel shoulder ahead of the receiver. If you have a lathe, you can use that. Otherwise a hack saw or dremel with a fiber wheel will do the trick. Just make sure you do not cut into the receiver. The step to barrel diameter start in the receiver.
Once I cut to depth it came off with a pop. At that point discard old barrel and clean threads and locking lugs of the receiver. Inspect for damage or cracks. Once clean it is time to install the new barrel. Begin by inspecting the barrel for any damage.
Next dust the barrel vise clamping surface with some rosin. Slip the barrel in and clamp it down (hard). Make sure the timing mark is at 6 O'clock so you can see it as you have to time the receiver to the barrel. Apply some oil or anti-sieze to the threads of the barrel and barrel shoulder. Thread the receiver on until it contacts the shoulder. It should be within 20 or 30 degrees of timing. Install the action wrench and crank her on. Make sure the barrel does not spin in the vise. Chances are you will get it close and it'll not want to go any more. At that point back it off. Then bring it back up, drop some oil in the gap and then crank her home. It can be a real work out.
Remove the barreled receiver from the vise. The hard part is done. Put the action in a vise to hold it and install the STRIPPED bolt. Grab your Go gauge, slide it into the chamber and see if the bolt will close. It shouldn't as the barrel chamber is short chambered and will require finish reaming.
Since this is a bolt action and the chamber is just shy of finish depth you need a finish reamer and you can use one with a solid pilot since the reamer is going to follow the semi cut chamber.
A new PTG, Manson or Clymer reamer can be purchased through Brownells or Midway for a $100 or a bit more. If you don't think you need a reamer lying around for future use you can rent one for about $50 from Elk Ridge Reamer Rental (reamerrentals.com).
In the next installment we'll ream to depth. Then I will decide whether to send the entire gun (less wood) to Shuff's (if he has time after surgery) or CMP custom shop to be parkerized. Originally the gun was blued but would likely have been parkerized @ WWII era rebuild. Maybe I will just buy a DIY manganese parkerizing kit and do it all myself. Blast and parkerize. I guess it depends on the crazy Winter we seem to be having.

Results 1 to 8 of 8
Thread: Lets Re-barrel a 1917 Enfield
-
01-26-2014, 09:39 PM #1I am a Forum User


- Join Date
- Jul 2008
- Location
- Monroe, Michigan
- Posts
- 2,607
Lets Re-barrel a 1917 Enfield
Last edited by Rootsy; 01-31-2014 at 01:11 PM.
-
01-26-2014, 10:02 PM #2I am a Forum User
- Join Date
- Feb 2009
- Location
- Saginaw, MI
- Posts
- 3,440
Very nice post. I am looking forward to the rest of it when you are done.
-
01-27-2014, 09:49 PM #3I am a Forum User
- Join Date
- Jan 2013
- Location
- Livonia
- Posts
- 547
Looking good. What is the Facebook gun group you speak of?
-
01-28-2014, 09:28 PM #4MGO Member

- Join Date
- Jun 2008
- Location
- Bay City
- Posts
- 8,270
Thanks for posting...a friend has an original 1917 (their grandfather's military rifle) and I've been reading up on them over the past few months. Looking forward to your next post!
My LinkedIn Profile
ALWAYS interested in left-handed rifles and shotguns. BUY/TRADE - PM me
Every person has a right to keep and bear arms for the defense of himself and the state. - Michigan Constitution, Article I, § 6
-
01-31-2014, 09:53 AM #5I am a Forum User
- Join Date
- Jul 2008
- Location
- Monroe, Michigan
- Posts
- 2,607
I reamed the chamber on Tuesday. Dropped the gun off last night @ Shuff's Parkerizing in Jerome (only a few miles from Jerome Country Market for you deer hunters). He is the "Go To" fellow for refinishing of this type.
http://shuffsparkerizing.com
Anyway, finish reaming isn't that difficult nor is it rocket science. Just be aware of how a reamer works, how to handle it, the types of reamers available and how to tell if a reamer is sharp.
I have a PTG solid pilot reamer I use. This reamer cuts the whole chamber, including neck, throat and lead as it goes. You can also get reamers specifically for this purpose that are pull through (from the muzzle end) with a bushing to center in the short chamber and bear against the bolt. When the bolt just falls into battery then you are done. On the M1 Garand or other semi-auto where you have no clear view of the bore from chamber end you have to use a pull through reamer. Some of these reamers (short chamber specific) are not designed to deepen the lead or throat but just to move the shoulder forward on bottle neck cartridges others are full chamber reamers.

For bolt actions you can use a rear driven reamer like I have. The square on the end is a 3/8 drive on the end of a round shank and is meant to be lathe driven. It will work fine by hand though. A T-handle with a 3/8 square drive on the end works well to run the reamer. Whatever you use just make sure it does not bind against the action and side load the reamer.
Reamers are meant to be run in one direction. They are precision ground and somewhat fragile if bumped against hard surfaces (such as steel). When cutting never back a reamer up (spin it in the opposite direction). This will dull the reamer or possibly damage it.
To get to the meat and potatoes of this rather simple exercise, begin by securing the barreled action in a vise or barrel vise to securely hold it. Clean the existing short chamber well. A short chamber is simply a chamber that has not been finished to depth. The bolt should not close on a Go gauge. I always begin by inserting the Go gauge to see where I am at. In this case the bolt is stripped down to just the bolt body and extractor collar so that there is nothing to interfere with the bolt going into battery or contacting the gauge.


Clean your reamer and inspect it for damage. Lubricate with a good cutting oil and slide it into the chamber. Find an index (such as a flat ground on the shank, or lettering) and note it's location. Insert your driver and turn in the appropriate direction (generally clockwise) applying light pressure. Make 3 or 4 revolutions and on the last one pull back slightly to disengage the reamer from cutting and withdraw the reamer. Clean the chamber with a patch to remove chips and oil. Install the Go gauge and see how much further the bolt falls toward full battery. Clean your reamer of chips between iterations and re-oil.

Repeat this procedure until the bolt falls completely into battery on the Go gauge. You will know when you are getting close, it will likely take you 4 - 6 iterations of ream & check to get close. Go slow on the last iterations, maybe only a turn or two. The difference between Go and No-Go is only a few thousandths of an inch (.004 on an '06). First photo I am about half way there, second photograph the bolt just falls completely into battery on the Go gauge.


If you see chatter stop and inspect your reamer for damage or the driver for contact in the chamber. Unless you are a skilled tool maker with a lot of experience send dull reamers out to be ground by a professional. Small nicks can generally be stoned to remove burrs but that is about all I want to do on a $100 + tool.
Once finished, clean it all up, remove any chips, inspect the bore under light to make sure there are no imperfections or scratches. If you are not happy and want to further polish there are shaped stones available for burnishing / polishing of chambers.
This is a very quick synopsis for a nearly 100 year old battle rifle. Precision rifles entail much more detail, time, machinery and expertise. I did build a custom 700 Remington once with a short chambered Douglas XX barrel that is a one hole wonder in 35 Whelen AI. It did require lathe work on the barrel and action but I did hand finish the chamber as above.
-
04-04-2014, 11:17 AM #6I am a Forum User
- Join Date
- Jul 2008
- Location
- Monroe, Michigan
- Posts
- 2,607
The 1917 lives again. I picked her up from Shuff a couple of weeks ago. He does one heckuva job and if you want / need parkerizing done he is your man.
Gun turned out well. Everything re-assembled without issue though the safety can be a PITA to get back together. Cleaned the stock, gave it a couple of coats of oil and she is ready for her maiden voyage for some regulating. The 1917 has no windage adjustment at the rear sight so you have to drift the front sight. If it performs well I may have to add Vintage Military to my list of entries at the National Matches this year.


-
04-04-2014, 11:47 AM #7I am a Forum User
- Join Date
- May 2011
- Location
- SE MI
- Posts
- 2,422
Looks great! Congrats on a job well done.
-
04-04-2014, 12:03 PM #8I am a Forum User

- Join Date
- Sep 2013
- Location
- Manistee
- Posts
- 2,508
This is a good skill to know. Thanks.


 Reply With Quote
 Posting Permissions
|
|

